
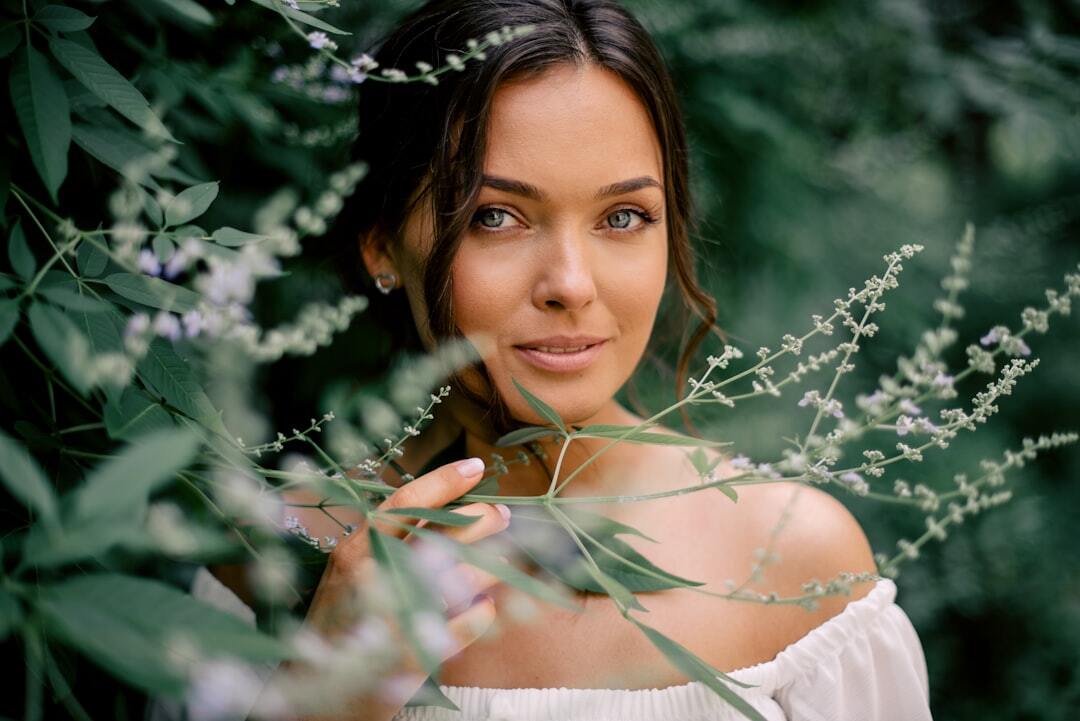
A natural glowing makeup look should make your skin appear fresh, healthy and softly luminous without making the makeup itself the first thing people notice. The aim is not perfectly smooth, texture-free skin or an obvious layer of highlighter across the cheekbones. It is about evening out the complexion where needed, adding warmth and colour, and allowing some of your natural skin to remain visible.
The easiest way to achieve that effect is to use less product, but place it more carefully. A lightweight base, targeted concealer, softly blended blush and controlled luminosity will usually create a more convincing glow than piling illuminating products over the entire face. You can follow the full routine for a polished everyday look or strip it back to just a few steps when you want something quicker.
Start with Skin That Feels Comfortable and Hydrated
Natural-looking makeup starts with skin preparation, but that does not mean layering half a dozen skincare products immediately before applying foundation. Clean skin followed by a moisturiser suited to your skin type is often enough, with SPF as the final skincare step during the day. Give everything a little time to settle before starting your makeup so the base does not slide around or separate on top of freshly applied creams.
If your skin is dry, concentrate moisturiser around areas where foundation tends to catch or become flaky. Oily or combination skin does not need to be covered in an illuminating primer to achieve a glow; you can use a smoothing or oil-controlling primer selectively through the centre of the face and allow the cheek area to retain more natural luminosity. Hydrating or illuminating primers are completely optional. Good preparation is simply about making the skin comfortable enough that you do not have to compensate with more makeup later.
Use Less Base and Let Real Skin Show Through
Heavy, uniform coverage can quickly make a natural makeup look feel too polished. Start with a skin tint, tinted moisturiser, sheer foundation or lightweight buildable base and apply it mainly where you actually want to soften redness or uneven tone. The centre of the face often needs more coverage than the outer edges, so there is little reason to apply exactly the same amount from forehead to jaw.
Blend the product outwards in thin layers and allow freckles, small variations in colour and natural skin texture to remain visible if you are comfortable with them. Fingers can help sheer a lightweight base into the skin, while a damp sponge creates a similarly soft finish. A brush may give slightly more control and coverage. None is inherently better; choose the method that gives you the finish you prefer and resist the temptation to keep adding product simply because a tiny imperfection remains visible.
Conceal Only Where You Actually Need It
Once the base is in place, look at the complexion again before reaching for concealer. You may only need a small amount at the inner corners of the eyes, around the nose, over a blemish or across a patch of pigmentation. Applying a heavy triangle beneath both eyes and then covering every remaining mark often removes the natural variation you worked to preserve with the lighter base.
For individual blemishes, place a small amount of concealer directly over the area and allow it to sit for a moment before blending mainly around the edges. This keeps more coverage where it is needed rather than spreading the product across surrounding skin. Under the eyes, concentrate on shadows rather than trying to make the whole area one bright, flat colour. The goal is to look more even and rested, not completely airbrushed.
Add Warmth with Bronzer, Not a Heavy Contour
A natural glowing look usually benefits more from gentle warmth than sharply sculpted cheekbones. If you use bronzer, apply a small amount around areas that might naturally catch the sun, such as the upper cheeks, temples and hairline. A light touch across the bridge of the nose can work too if you like the effect. Blend until there is no obvious edge between bronzer and skin.
Cream or liquid bronzers integrate particularly well with a sheer base, but a finely textured powder can look just as natural when used sparingly. Choose a tone that suits your actual complexion rather than automatically reaching for something very orange or dramatically deeper. Bronzer is also optional. If your colouring already has plenty of natural warmth, or you prefer a cooler complexion, blush alone may provide all the dimension you need.
Make Blush the Main Source of Freshness

Blush often does more for a fresh complexion than highlighter because it recreates the natural colour that can disappear once foundation and concealer are applied. Cream and liquid formulas are especially useful for this look because they can be tapped into the base until the colour appears to come from the skin rather than sitting visibly on top of it.
Placement can change the effect. Blush placed slightly higher on the cheeks can create a lifted finish, while colour concentrated on the apples gives a softer, more youthful flush. A very light amount carried across the cheeks and bridge of the nose can create a sun-touched effect. There is no single correct placement for every face shape, so experiment rather than following a diagram too rigidly.
Choose shades that relate naturally to your colouring and build them slowly. Peach, rose, berry, coral and deeper plum or terracotta tones can all look natural on the right complexion. Start with less than you think you need and add another thin layer if necessary. It is much easier to intensify blush than to rescue a base after applying too much.
Highlight Where Light Naturally Hits
Highlighter should support the glow rather than become the glow. Instead of drawing a bright stripe across the cheekbone, use a small amount on areas that naturally catch light, usually the highest point of the cheek. Depending on your preference, you might also add a restrained touch to the brow bone or Cupid’s bow.
Balmy, cream and subtle liquid formulas often work particularly well because they create reflection without obvious glitter. Tap the product into the complexion and soften the edges until you cannot see exactly where it begins. If your base and cream blush already leave the skin looking naturally luminous, you may not need highlighter at all.
Be selective if you have areas of texture you would rather not emphasise. Highly reflective products can draw attention to raised texture or enlarged pores, so placing luminosity slightly away from those areas often gives a smoother-looking result than trying to make the whole face shine.
Keep Brows Soft Rather Than Over-Defined
Brush your brows into place before deciding how much product they actually need. If they already have a good natural shape, clear or tinted brow gel may be enough. Where there are gaps, use a fine pencil or brow pen to add a few short strokes that mimic individual hairs rather than colouring the entire brow into one solid shape.
Concentrate definition where it is needed and keep the front of the brow softer. The finished brow should frame the eyes without becoming one of the strongest features on the face. Very crisp outlines and heavily filled tails can quickly push an otherwise natural makeup look towards something much more formal.
Define the Eyes Without Making Them Look Heavily Made Up
For the simplest version, curl the lashes and apply a light coat of mascara. That alone can make the eyes look more awake while keeping the overall finish minimal. If you want more definition, use a soft brown, taupe or neutral shade close to the lashes and blend it until there is no obvious line. A small amount of pencil worked between or immediately above the lashes can create depth without looking like traditional eyeliner.
You can also sweep one neutral shadow across the lid rather than building a complicated multi-shade eye look. Matte or softly satin textures generally sit more naturally within this style than highly metallic finishes. Mascara should separate and define rather than create very heavy, clumped lashes. Black can look completely natural on deeper colouring and dark lashes, while brown or softer black may suit lighter features; there is no universal rule.
Keep Lips Close to Their Natural Colour
Lips should feel like part of the same soft, fresh finish. A balm, tinted balm, sheer lipstick, lip oil or gloss can provide enough colour and moisture without turning the mouth into a strong focal point. Choose a shade that relates to your natural lip colour rather than assuming that “nude” means one particular beige.
If you want slightly more definition, use a lip pencil close to the natural tone of your lips and concentrate on areas where the shape needs correcting or sharpening. Soften the line inward with a fingertip or brush instead of leaving a very precise border. Adding balm, gloss or sheer lipstick over the top helps everything merge together and keeps the finish comfortable rather than overly perfected.
Powder Only Where You Need It
Glowing makeup does not mean avoiding powder completely. In fact, controlling shine in selected areas can make the luminosity elsewhere look more deliberate. Use a small amount of finely milled powder around the nose, through the centre of the forehead, on the chin or beneath the eyes if those are places where makeup tends to move or become excessively shiny.
Leave the upper cheeks and other areas where you want natural reflection relatively untouched. Oily or combination skin may need slightly more powder through the centre of the face, while very dry skin may need almost none. The aim is contrast: skin can look fresh and luminous without every centimetre reflecting light equally.
Finish by Blending Everything Together
Before adding another product, take a moment to look at the whole face, ideally in natural daylight. Check the jaw and hairline for visible foundation edges, make sure the bronzer disappears naturally into the complexion and look for any patches of blush or highlighter that are sitting separately from the base.
A clean sponge, fingertips or the brush you used for foundation can soften anything that looks too strong without applying more makeup. Pressing lightly over the boundaries between products helps them appear to belong to the same complexion. If you use a setting spray, a light mist can help take away an overly powdered finish and improve longevity, but it is an optional final step rather than something every glowing makeup look requires.
Adjust the Glow for Your Skin Type
The same formula will not suit every complexion. Dry skin often benefits from a more moisturising base, thin cream textures and very selective powdering. Avoid trying to compensate for dryness with large amounts of highlighter, particularly where the skin is flaky; comfortable preparation and a flexible base generally produce a better glow.
Oily or combination skin can still look luminous without being shiny everywhere. Use longer-wearing base products where useful, control oil around the T-zone and reserve cream or highlighting products for selected parts of the cheeks. There is no requirement to avoid mattifying products simply because the finished look is described as glowing.
On textured or mature skin, finely layered products tend to look more convincing than thick coverage followed by strong highlighter. Natural skin texture does not need to be erased, and a subtle sheen placed carefully can look far more flattering than highly reflective product spread over every raised area. Ultimately, adapt the technique to how your skin behaves rather than trying to force it into a particular beauty trend.
A Five-Minute Natural Glow for Busy Mornings
You do not need every step above to create a fresh everyday face. When time is short, strip the routine down to the products that make the biggest visible difference:
- Moisturiser and daytime SPF
- Skin tint or concealer only where needed
- Cream or liquid blush
- Brow gel
- Mascara
- Tinted lip balm
If you have another minute, add a small amount of bronzer or tap a little highlighter onto the cheekbones. The same principles still apply: even the complexion without completely covering it, use colour to bring life back into the face and keep definition soft around the eyes, brows and lips.
The most convincing natural glow usually comes from restraint. When skin texture remains visible and it is difficult to identify exactly where one product ends and another begins, the makeup looks less like a collection of techniques and more like healthy, naturally radiant skin.